What happens when you have bangles and beads lying unused around your house? You make cuff bracelets! And de-clutter at the same time. And end up with some cool new arm candy.
Cuff bracelets are cool. Cuff bracelets from bangles? Cooler 😛
These cuff bracelets are great because they are simple, customizable, and best of all—adjustable without any annoying lobster clasps.
MATERIALS:

- Bangles (Thin enough to be cut with cutting pliers and bent; thick enough to stay in bent shape)
- Beads (with holes big enough to thread through your bangles)
- Small piece of linked chain (about 1 inch in length)
- Cutting pliers
- Glue (depending on where you live, get a strong glue that can stick metal to metal. Please make sure to follow the instructions of your glue of choice)
- Optional – Clothes pins for drying your cuffs (yup. you’ll see)
TYPES:
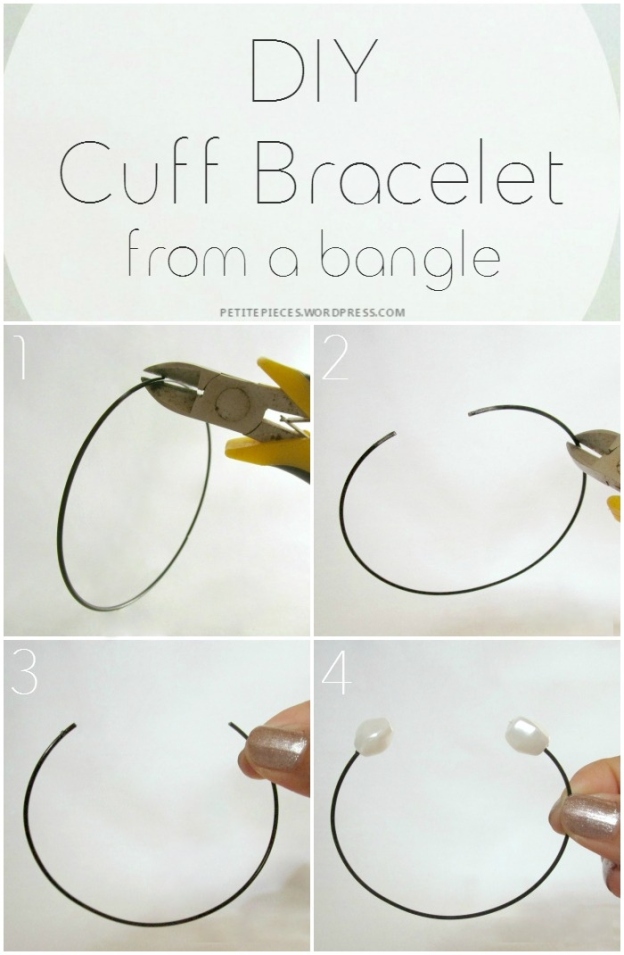
1. Subtle Spiral

STEPS:
ONE. Using your pliers, carefully cut your bangle at one point.
TWO. Pull the two ends apart from each other as shown, so they move to the opposite directions. The distance between the ends really depends on you.
THREE. Thread one bead into one end. Holding the bead right at the end so the edge of the bangle doesn’t jut out, glue the bead in place. Make sure you apply glue onto both holes of the bead.
FOUR. Repeat step three with the other matching bead. Keep aside to dry by hanging it from a clothesline (or any line) using a clothespin, and you’re done!
2. Spaced Out
STEPS:
ONE. Cut off a portion of your bangle (about a quarter of the whole length. Your choice) with pliers.
TWO & THREE. Bead in one bead into one end of the bangle and glue in place. Repeat with your matching bead on the other end. Again, make sure to apply glue onto both holes of each of your beads to make them more secure!
FOUR. Set aside to dry before wearing,
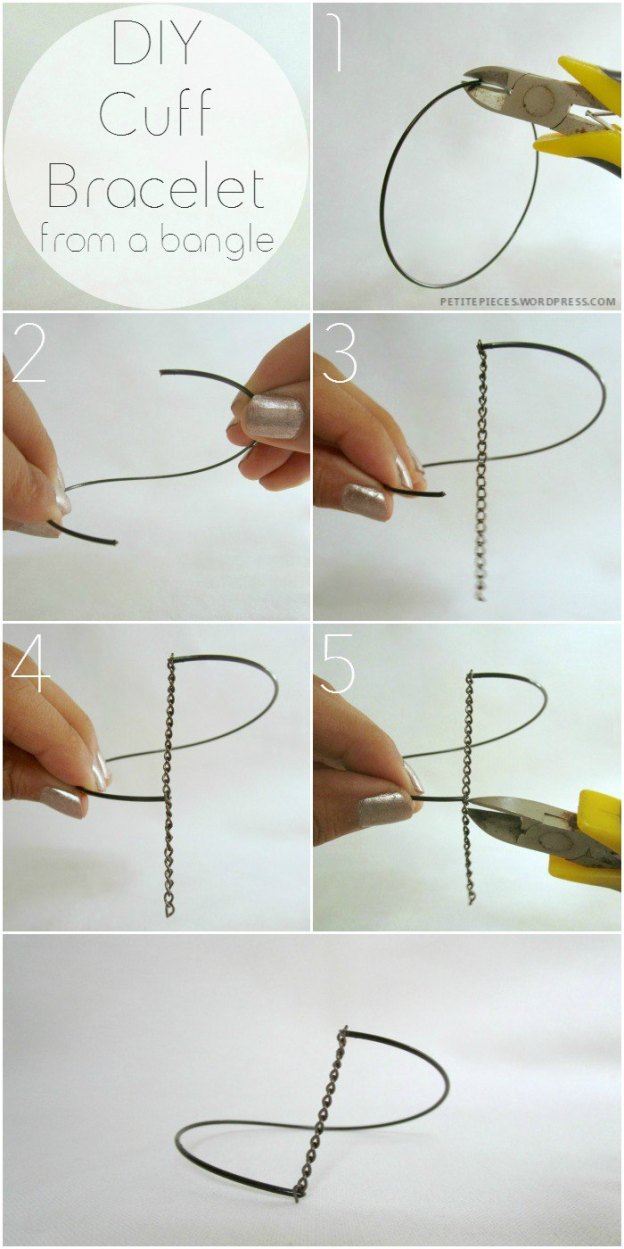
3. Bangle & chain
STEPS:
ONE. Cut your bangle at a single point.
TWO. Pull apart the ends in opposite directions till there’s about one inch of space between them.
THREE. Take your chain and thread in the first link into one end of your bangle. Keeping it just at the edge of the bangle, hold it in place so it doesn’t slide off. Now with a generous amount of glue, glue it into place. Set it aside till it is completely dry.
FOUR. Once dry, take the chain and pull it so it’s nice and straight. While still pulling, loop it through the other end of the bangle with whichever link hole ( i dunno what to call them) is closest.
After beading it in, the chain should still have tension and stay nice and tight. Cut off the excess chain with pliers.
Now you can glue this end as well and then let it dry. Voila!
Be careful not to press the ends of the bangle back in or you’ll lose this tension! Even while putting the bracelet on or taking it off you need to keep this in mind if you still want the tension. Cuz you can’t get it back once it’s glued!

Result!
Guys I hoped you enjoyed this simple tutorial and will try it out for yourselves! I had fun making these and ended up making a few more (or maybe it’s cause I had too many bangles and beads lying around my room?) Remember to tag me on instagram if you make any!
Ciao!
Namrata. ♥
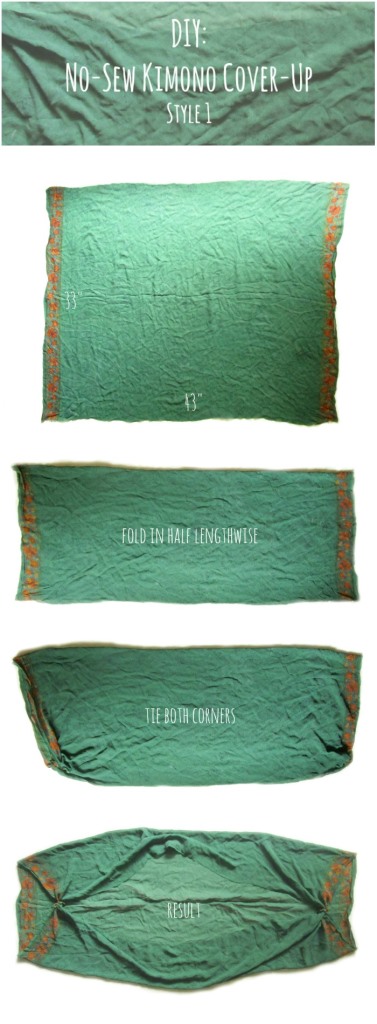
 The “kimono” or the kimono-inspired cover-up (’cause cummon. we all know they’re not real kimonos. The Japanese should take their credit) is such a popular trend these days, and I’ll admit, I’m a fan of it.