
 The “kimono” or the kimono-inspired cover-up (’cause cummon. we all know they’re not real kimonos. The Japanese should take their credit) is such a popular trend these days, and I’ll admit, I’m a fan of it.
You can throw it over almost anything, from the typical bustier and cutoffs, to dresses and maxi skirts, and look just fab. This jacket-cardigan-cape thing can be worn to fit different styles as well, from sophisticated chic to laid back boho. I personally prefer the latter.
I know they come in all types of cuts and sizes, and today I’m gonna share 4 of my ways to get this trend… without sewing!
MATERIALS:
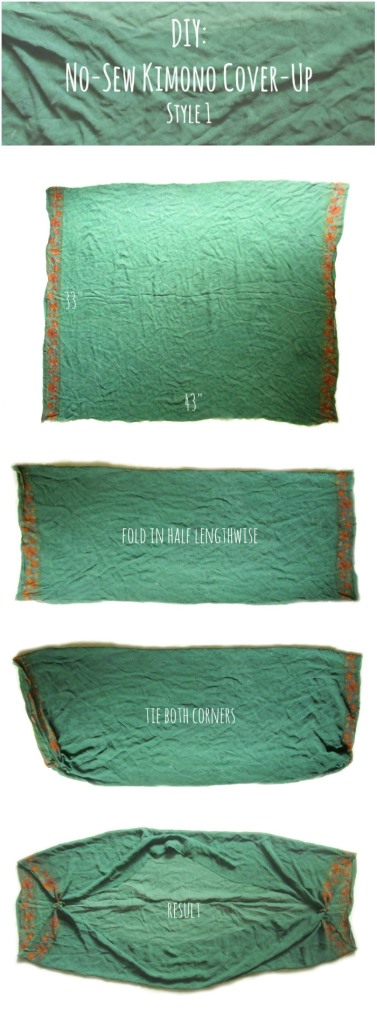
- Chiffon cloth (about 33″ in length and 13″ in breadth. You could also use a dupatta if you have one! That’s what I did)
- Scissors
- Measuring tape
TYPES:
1.
STEPS:
One. Fold the fabric in half lengthwise.
Two. Tie the meeting corners into a double knot.
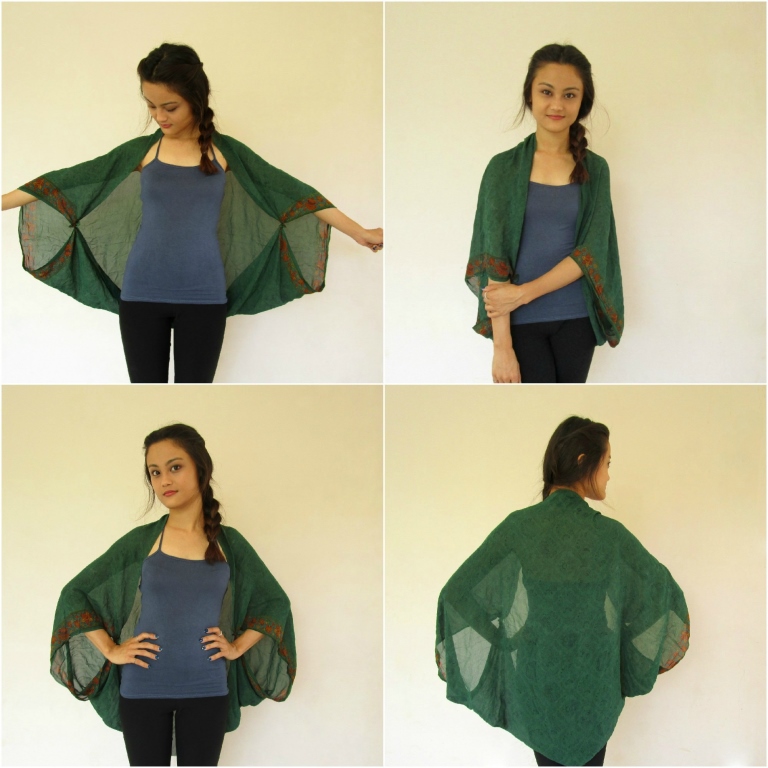
Three. Wear! Your hands go into the two holes created after tying.
2.
STEPS:
One. Fold in lengthwise so the top layer ends at about the 2/3rd (imaginary) line.
Two. Tie the two top-layer corners to the edge of the bottom layer at the point where they meet. Make sure to tie small and secure double knots so it’s not bulky.
Three. Wear! You’ll get a nice drapey effect and some extra fabric hanging under each arm, which I love.

3. 
STEPS:
One. Lay your fabric flat on the ground and fold in half lengthwise.
Two. Using your measuring tape, find the centre of the length.
Three. Attach a pin to mark the centre. Repeat this a few times so you get a few pins creating a line down the middle of your fabric.
Four. Cut the front flap, I repeat, the front flap only! Start from the bottom and cut a straight line using the pins as your guide. Stop cutting when you reach the fold.
Five. Tie the two bottom left corners that meet into a secure double knot.
Six. Repeat on the other side with the bottom right corners.
Seven. Wear!! (wow, I’m really getting excited)

4. 
STEPS:
One. Fold your fabric in half lengthwise and then cut a slit up the middle of your front layer only (as shown).
Two. Lift the two front portions (like in the picture above) till the outer two corners of the front layer are at about the half point of the bottom layer.
Three. Tie the two outer corners of the front layer to the edge of the back layer.
Four. Wear! 🙂

Easy ways right?They’re great for when you’re in a kimono emergency and need one asap. Kinda like quick fixes. You’re welcome.
Hope you enjoyed, guys!
Please tag me in your recreations on Instagram! Would love to see them. My insta icon in on the right sidebar of this page. Have fun!
Namrata. ♥

This is awesome for summer, nice. Thank you for sharing.
LikeLiked by 1 person
Love love ideas. Thanks
LikeLike
very nice …thanks for sharing…gonna make one for my daughter
LikeLike
That’s amazing 🙂
LikeLike
Hi Samrata,
Great ideas for simple cover ups. Thanks!
I do something similar with an x large scarf, by opening out lengthwise, then taking the the top two corners over each shoulder and tying them behind my back, the rest falls free.
Jill
LikeLike
Hey, that’s a great idea 🙂 thanks for sharing.
LikeLike
Love these I have alot of sleeveless tops & dresses, but I also have fat arms! lol Thanks for the great ideas!
LikeLike
Super cute and easy! I’m going to give the first one a try! Thanks!
LikeLike
Thank you! You’re welcome!
LikeLike
Love
Sharing
LikeLike
Thank you so much for these ideas, I’m trying them right now 😀
LikeLike